
Multicolor Bulb Using Arduino Project


Since now we are all familiar with RGB LED’s let us show you one of the products made by us ( Karkhana Makerspace).


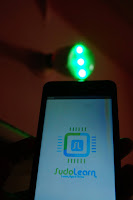
The below is the video of our product (Mobile Control RGB Bulb)

Working description:

It is a decoration lamp which can be used to lighten your home according to your mood or occasion.
The color selection of the lamp is simply controlled with the help of our app.
The concept is the same as I have mentioned in my previous blogs here we are giving instructions wireless via Bluetooth to the controller which drives the lamp.

For any detail or query regarding the above project,
Contact us at hello@karkhana.club

Thinking?
Join our hands-on training courses.
To know more visit us at https://karkhana.club/

Comments

Popular posts from this blog

LED Brightness Control using Touch Sensor and ARM

Hey Folks, In this tutorial, we will learn, how to change  the intensity of light using touch sensor the ARM (FRDM-KL25Z). INTRODUCTION The FRDM-KL25Z is an ultra-low-cost development platform for Kinetis L Series KL1x (KL14/15) and KL2x (KL24/25) MCUs built on ARM® Cortex™-M0+ processor.  The FRDM-KL25Z has been designed by NXP in collaboration with mbed for prototyping all sorts of devices, especially those requiring the size and price point offered by Cortex-M0+ and the power of USB Host and Device. The FRDM-KL25Z is supported by a range of NXP and third-party development software. It is packaged as a development board with connectors to break out to stripboard and breadboard and includes a built-in USB FLASH programmer.               FEATURES NXP KL25Z Kinetis KL2x MCU (MKL25Z128VLK4) High-performance ARM® Cortex™-M0+ Core 48MHz, 16KB RAM, 128KB FLASH USB (Host/Device) SPI (2) I2C (2) UART (3) PWM (TPM) ...

Interfacing of Push Button With ATmega16

In this tutorial, we will learn how to interface a switch(push button) with ATMEGA16 using AVR studio. In the previous video, we learnt how to interface LEDs with ATMEGA16 using AVR studio. The push-button is a component that connects two points in a circuit when you press it. The example turns on an LED when you press the button. Here we have connected two push button to PORT C in  PC0 & PC1. And for LEDs connection please refer my previous blog. Components Required:- AVR Controller(Atmega16) LEDs Push Button Connecting Wires USBASP Programmer Dump the following code after connection  and select chip ATMEGA 16. #include<avr/io.h> #include<util/delay.h> void main()  {    DDRB=0b11111111;    int S1;    int S2;      while(1)    {     S1=PINC&0b00000001;     S2=PINC&0b00000010;     if(S1==0b00000001)     { ...

Interfacing 7 Segment with ARM

Hey Folks, In this tutorial, we will learn how to interface a Seven Segment Display with ARM(FRDM-KL25Z). Components Required FRDM-KL25Z board Seven Segment Display (Common Cathode) Breadboard Mini Jumper Wires (As Required) FRDM-KL25Z         2. Seven Segment Display        3. Breadboard Mini         4. Jumper Wires (Male to Male)   Follow the Image below for circuit connection reference:-  (Interfacing all components) After making the circuit dump the code given below:- #include "mbed.h" BusOut display(PTA1,PTA2,PTD4,PTA12,PTA4,PTA5,PTC8,PTC9); int main() {          while (1) {                 display= 0xBF ;         wait( 1 );         displa...